
During the last year I have been making quite a few porcelain rings with imprinted text, and I thougth someone might find it interresting to see some of the process behind them. And I do appologize for the poor quality of the pictures - the light in our studio is not great. In fact it is pretty awful. But here goes....

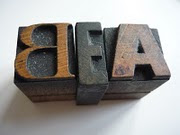
"m" for manicure.....which is what you need after working with clay all day :) Handstamping the text with lead type.

A tray of freshly formed and imprinted rings, clay still wet. I'm not too bothered about neatness at this stage, as there is still a lot of work to be done on them. They are also pretty fragile at this point. The important thing is that the printing looks ok. They will now be wrapped in plastic and left to dry for up to a week. I like to let them dry slowly; I seem to get less dry cracking that way. (In the middle right back there you can see one that is whiter in colour than the others; it dried too quickly and later broke)

The rings are now completely dry, and I have filled in the imprinted letters with underglaze, using a thin brush to push the colour into every nook and cranny. They are now ready to be bisque fired to 950 degrees C.

After bisque firing the rings are a lot sturdier (think terracotta pots) and can cope with a lot more handling. This is where the most labor-intensive part starts, with lots of sanding and elbow grease. But it is also the most rewarding, as it is the first time I really get to see what the finished result might look like. I sand down the outside to remove the excess color - this is where a bad print job will reveal itself. I also remove all sharp edges and sand down the inside to get the ring to the thickness I want. (This would have been a lot easier to do before bisque firing, but I ended up breaking so many rings that way that I now go for the slower but more successful option)

....eight hours later.....

....after a good wash and another day of drying, they are ready for a dip in a bowl of clear glaze, before going into the oven a second time - this time to 1255 degrees C.

....and Voila! A batch of freshly baked porcelain rings!
These are so beautiful! I just found you via Etsy and I love your work. So glad to have come across the beautiful things you make!
ReplyDeleteSarah
http://sadiedesigns.blogspot.com
your work is so original and beautiful
ReplyDeleteafter you dip the rings into the glaze how do you keep them from sticking to the oven when they are being baked?
lyn
Sarah: Thank you for your lovely comments! As you can tell, I am not that used to getting these, as it has taken me months to notice it. So sorry, and promise to be more dilligent in the future!
ReplyDeleteLyn: Well spotted :)Before firing, I clean the glaze off the 'top' and 'bottom', so that the side that is resting on the oven plate does not have any glaze on it. (I don't really need to clean both sides, but I like them being the same.)
Are you still making these? I keep hoping to see you turn up on etsy again - I would love to buy one!
ReplyDeletethanks,
Marisa
I am assuming you roll out some clay, and then you roll to form the ring..... how are do hide the seam where the clay comes together? thanks
ReplyDeleteHi
ReplyDeleteVery nice work! I was wondering the same as the person above, how do you form the rings without showing a seam?